A cubby house can turn your backyard into something special for the kids. They will have their own space to play and grow, and they will love you for it!
Building a cubby house is not an easy DIY project, but if you’re up for it, here’s how to make the best cubby house!
First, get the council’s approval (and your landlord’s)! Nothing worse than spending a huge amount of time and money only to have to scrap your creation.

What You’ll Need to Make a Wooden Cubby House
1) 1 bag Rapid set concrete ($10)
2) 20 x bugle baton screws (65c each)
3) 4 bags 75mm galvanised nails ($5.95 bag)
4) 2 bags 50mm x 2.8 flat head clout roof nails ($5.95 bag)
5) 6 Lm 90 x 90mm H4 treated pine posts ($21.99/m)
6) 15 Lm 150 x 50mm hardwood beams ($12.73/m)
7) 6 sheets 2400 x 1200mm exterior bb board 12mm ply ($89.80/sheet)
8) 50 Lm 70 x 45mm hardwood timber ($6.37/m)
9) 15 x 1200mm treated pine pickets ($7.35 each)
10) 35 x 2100mm treated pine fence palings ($2.90 each)
11) 90Lm 42 x 10mm treated pine lattice batons ($2.60/m)
Making The Cubby House Floor
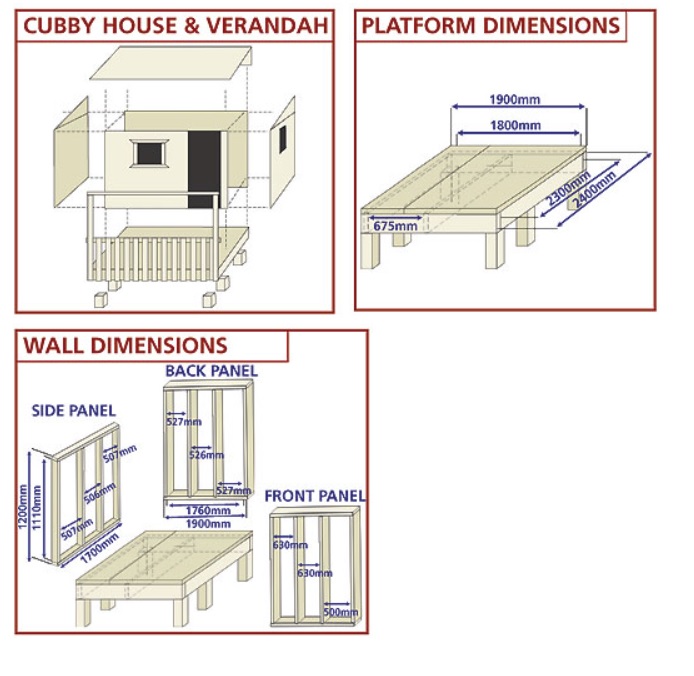
First, we need to establish the dimensions of the cubby house. To do this, we'll need to mark a perimeter of 2300 x 1800mm. This will need to be measured accurately, as if any of the sides have even small variations the entire project will be skewed.
Holes need to be made at each corner, and 2 more at 700mm from the front edge - these last 2 will be where the verandah meets the cubby house. The deeper the posts go into the ground the more secure they will be. The minimum depth you want to achieve is 600mm. Once the posts are in the ground, secure them with a rapid setting concrete or cement solution.
Next, you’ll want to attach the wooden beams (bearers) to the outside of the posts of the cubby house, forming a frame around the outside. These must be level. Use bugle baton screws to attach the beams to the posts.
Attach 2 cross members - 1 at 700m behind the verandah posts, and another at 1800mm from the front bearer. Nail them into the end grain from the outside.
You’ll need to put a final beam 150 x 50mm beam 675mm down from the front corner of the cubby house. You’ll need to trim the posts so that they are level with the bearers. A ply sheet of 2400mm x 1200mm and another 2400mm x 700mm on top of the supporting structure will finish the floor.
Lay one 2400mm x 1200mm sheet of ply flush with the corners of the frame (remember the inside length should fall over half of the noggin) and a second sheet (cut to 2400mm x 700mm) to finish the floor off.
Building the Cubby House Walls
Use 70 x 45mm timber to build the wall frames. We’’ do the side walls first. Cut out the top and bottom plates - these will need to be 1700mm in length. Lie them side by side to mark out the studs at 500mm spacing. These will be used for windows. The height of the wall frames should be 1200mm, and so therefore the internal stud size is 1110mm.
Measure and cut all the studs. You’ll want to stand them upright and using the corner studs, nail them down. Nail a piece of timber between the 2 centre studs 600mm up from the floor. Follow the same process for the other 2 walls.
Cut the top and bottom plates to fit between the side walls - around 1760mm. We’ll need to account for the cubby house door and window. Measure 500mm from the first and second stud; and then 600mm for the other 2 studs. Attach the studs to the front wall with another sill plate. Slide the front and back walls in and nail them to the side walls.
You’ll need to attach one sheet of 1200 x 1700mm ply to each side wall. Cut and attach a 1200 x 1900mm sheet to the back wall. Move these side wall and back wall sheets 25mm down each frame. This covers the joins at the floor and leaves a portion of the top plate to attach a gable sheet under the roof. Cut and attach a 1200 x 1400mm sheet for the front wall. This will be the door.
Building a Skillion Roof Frame for the Cubby House
At the back wall, nail a second top plate (45mm length at the vertical). Using 70 x 45mm timber, nail four skillion rafters to the back wall top-plate at about 470mm spacings. These rafters will cover the space from the back wall to the verandah. The rafters will need to run for another 100mm past the verandah to make sure all the verandah components can fit.
Build a Verandah and Roof for the Cubby House
The outside of the rafters provide a place for the attachment of 2 verandah posts. Measure the distance from the ground to the outside rafters and cut 70 x 45mm wood to suit. At each front corner, nail these new posts into place.
A 1900mm long verandah bearer needs to be attached at the front of the verandah posts. The verandah posts then need to be supported by a cross beam 600mm from the floor. Fasten the verandah posts to the floor frame at the bottom and the cross beam at the top.
Now using the 2100mm treated palings start creating the roof. Fix the palings to both each other and the rafters where they overlap.

Making Windows for the Cubby House
To cut out the windows you will need to drill holes just above the sill and then going up as appropriate in the shape of a square. Once done, you will be able to cut the windows out.
Too Hard to Make a Cubby House?
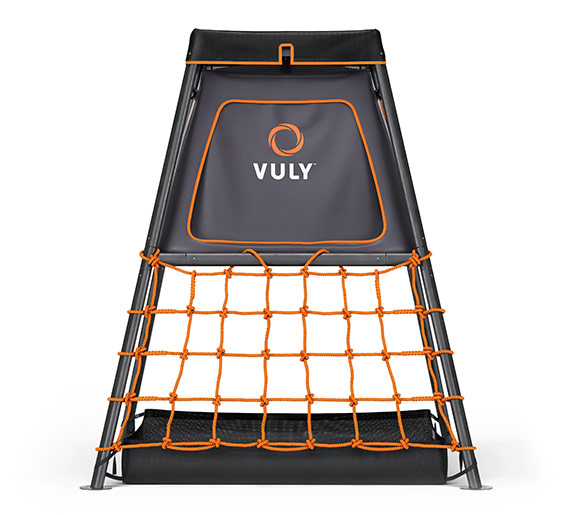
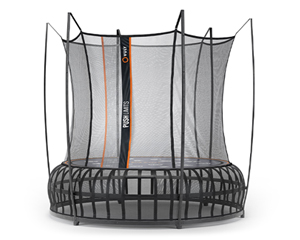
Vuly sells a modern cubby, easy to put together and boasting a sandpit, climbing net and night light. Vuly’s cubby integrates well into an entire playground set, as it’s also compatible with Vuly’s customisable swing sets. Build your own backyard playground today, at a very affordable price!